As a professional photographer of Portrait Photography Lighting Setup, I have always been fascinated by portrait photography. There is something magical about capturing a person’s essence through a single image. One of the most crucial aspects of creating captivating portraits is mastering the art of lighting setup.
In this comprehensive guide, I will take you through the various elements of creating stunning portraits through effective lighting techniques.
Importance of Proper Lighting in Portrait Photography
Lighting plays a critical role in portrait photography, as it can enhance or diminish the overall impact of an image. The proper lighting setup can highlight the subject’s features, create depth, and bring out their unique personality. On the other hand, poor lighting can lead to unflattering shadows, washed-out colors, and a lack of dimension. By understanding the principles of lighting and how to manipulate it, you can elevate your portrait photography to new heights.
Understanding Different Types of Lighting Setups
There are various types of lighting setups that you can use to achieve different effects in your portraits. Each setup has its characteristics and can be utilized to enhance specific features or create a particular mood. Here are a few standard lighting setups:
Loop Lighting
Loop lighting is popular for portrait photographers as it creates a natural and flattering effect. It involves placing the primary light source slightly above the subject’s eye level and at a 30 to 45-degree angle to the camera. This setup creates a gentle shadow that forms a loop on the opposite side of the subject’s face.
Rembrandt Lighting
Rembrandt’s lighting is named after the famous Dutch painter who often used this technique in his portraits. It involves placing the primary light source at a 45-degree angle to the subject’s face, slightly above their eye level. This setup creates a triangular patch of light on the cheek opposite the light source, while the rest of the face is in shadow.
Butterfly Lighting
Butterfly lighting, or paramount lighting, is characterized by a small, direct light source placed directly above the subject’s face. This setup creates a distinctive butterfly-shaped shadow under the nose, hence the name. It is commonly used in beauty and fashion photography to create a glamorous and dramatic look.

Essential Equipment for Portrait Photography Lighting Setup
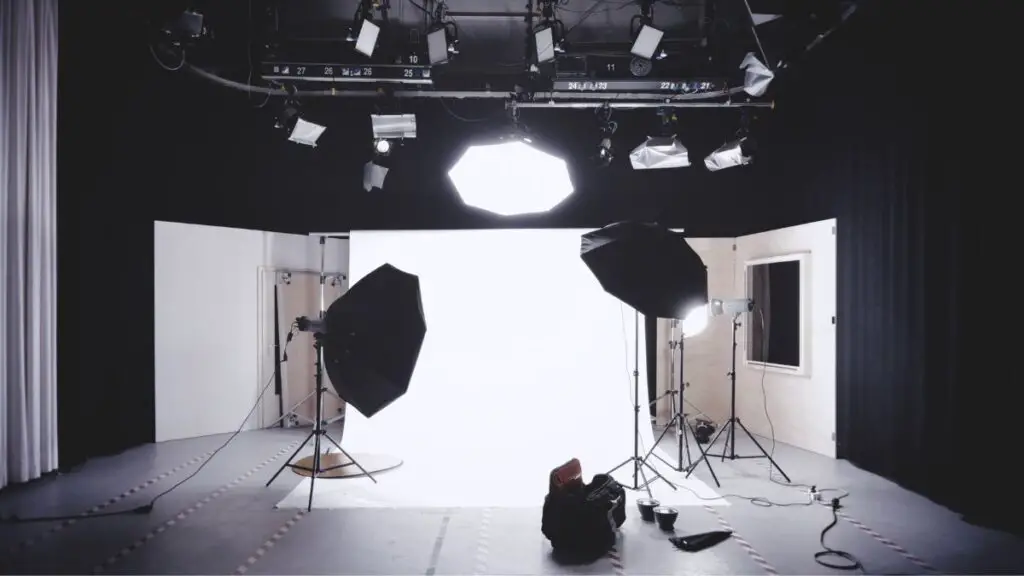
You will need specific essential equipment to achieve professional results in your portrait photography lighting setup. Here are the critical pieces of gear you should consider investing in:
Light Stands and Boom Arms
Light stands and boom arms are essential for positioning your lights effectively. Light stands provide stability and can be adjusted to different heights, while boom arms allow you to extend the light source over your subject without the stand getting in the way.
Light Modifiers
Light modifiers help control and shape the quality of light. Softboxes, umbrellas, and beauty dishes are commonly used to diffuse and soften the light, while grids and snoots can create more focused and directional lighting.
Reflectors
Reflectors are versatile tools that can bounce light back onto the subject, fill in shadows, or create specific lighting effects. They come in various shapes and colors, allowing you to experiment with different looks.
Light Meters
Light meters are essential for accurately measuring the intensity of light. They help ensure consistent and adequately balanced exposures, resulting in well-lit portraits.
Studio Portrait Photography Lighting Setup
Studio portrait photography offers the advantage of complete control over lighting conditions. Here’s a step-by-step guide to setting up your lighting in a studio:
Positioning the Main Light
Start by positioning your leading light at a 45-degree angle to the subject’s face. This light will be the primary illumination source and should be the brightest.
Adding Fill Light
Next, add a fill light on the opposite side of the leading light. The fill light helps to reduce shadows and create a balanced overall exposure.
Creating Separation with Hair/Backlight
Use a hair or backlight positioned behind the subject to create separation between the subject and the background. This light adds depth and dimension to the portrait.
Adding Additional Lights for the Background and Accents
If desired, you can add additional lights to illuminate the background or create accent lighting on specific subject areas, such as their hair, shoulders, or hands.

Outdoor Portrait Photography Lighting Setup
Outdoor portrait photography presents unique lighting challenges as you work with natural light and ambient conditions. Here are some tips to help you achieve the perfect lighting in outdoor portraits:
Utilize Golden Hour
The golden hour is the first and last hour of sunlight. It offers soft, warm, and flattering light. Take advantage of this magical time of day to capture stunning outdoor portraits.
Use Reflectors and Diffusers
Reflectors and diffusers can help you manipulate natural light outdoors. A reflector bounces light onto your subject and fills in shadows, while a diffuser softens harsh sunlight and creates a more pleasing look.
Seek Out Open Shade
When shooting in bright sunlight, seek out open shade areas where your subject is protected from direct sunlight. This will help you avoid harsh shadows and create more even lighting.
Tips for Achieving the Perfect Lighting in Portrait Photography
To achieve the perfect lighting in portrait photography, consider the following tips:
- Experiment with different lighting setups and modifiers to create different moods and effects.
- Pay attention to the direction and quality of light to highlight your subject’s features effectively.
- Practice using light meters to ensure accurate exposures.
- Don’t be afraid to break the rules and try unconventional lighting techniques for more creative portraits.
Common Mistakes to Avoid in Portrait Photography Lighting Setup
Even experienced photographers can make common mistakes in lighting setup in portrait photography. Here are a few pitfalls to avoid:
- Over or underexposing your subject by misjudging the intensity of the light.
- You fail to properly position and angle your lights, resulting in unflattering shadows or flat lighting.
- You neglect to consider the background and how it interacts with the lighting setup.
- Use harsh or unflattering lighting that doesn’t complement your subject’s features.
Advanced Techniques for Creative Portrait Photography Lighting Setup
For photographers looking to take their portrait photography lighting setup to the next level, here are some advanced techniques to explore:
- Experiment with colored gels to add a creative and dramatic effect to your lighting.
- Incorporate multiple light sources to create intricate and dynamic lighting patterns.
- Explore using unconventional light sources, such as LED panels or string lights, for unique and artistic portraits.
Conclusion and Final Thoughts
Mastering the art of portrait photography lighting setup is a journey that requires practice, experimentation, and a solid understanding of the principles of light. By utilizing different lighting setups, essential equipment, and outdoor techniques, you can elevate your portrait photography to new heights.
Remember to avoid common mistakes, be open to exploring advanced techniques, and always strive for creativity and innovation in your lighting approach. With dedication and perseverance, you can truly master the art of portrait photography lighting setup.
Don’t miss out on capturing stunning portraits with expert lighting. Take your photography skills to the next level and start creating captivating images today!

